Monday, September 15, 2014

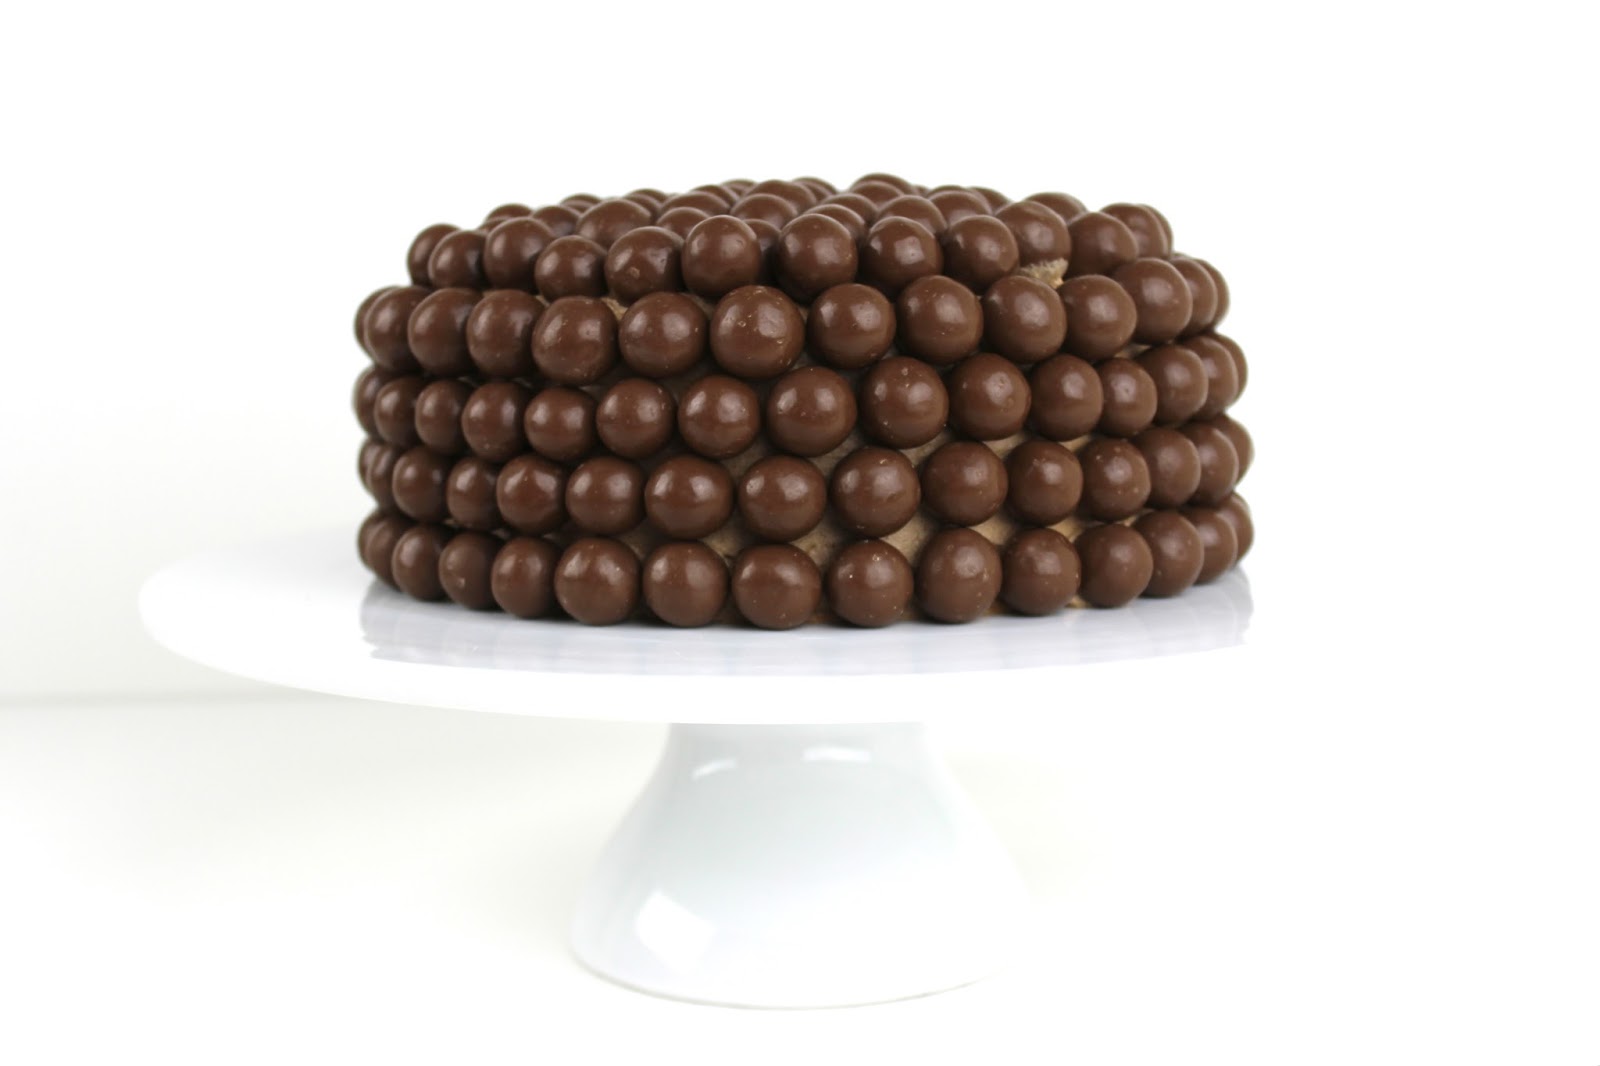
Malteser overload.

Hello all, and welcome to a fresh week and start. I had a lovely break away to recharge my batteries, even though I still managed to wake up at my usually time of 6am, but there was the nice feeling of not having to rush to go anywhere. I have also succeeded at writing another list of blog post ideas that I hope to create sometime in the future. For now I will be posting all of the food creations that have been stored in a file on my computer for quite sometime, as I work through these last two weeks of school until a another two week break.


You can probably tell already that I am slowly editing the design of my blog. I have added the image of myself wearing an ‘OMG CAKE’ t-shirt, which to be honest I think is a genius creation, and my mum help me create the idea when we were out shopping, so I best give some credit to her! It took many takes of positioning the cake as well as going through two different types of cake, until I was over the moon with how my Malteser cake turned out and my final photograph.    


I had a vision in my mind of how I wanted the finish look to be, and I would say it was 95% accurate – there were only minor alteration needed. Before I started baking and shooting, I knew the style and quality that I wanted and the next stage was actually pulling it off. Usually if something doesn't work out right the first time, I tend to lose interest and feel as though I cannot do it. However, this time around was different! I was determined to create a good quality photograph that I was happy with, looked professional to an extent and showcased my style and enthusiasm for my blog. I absolutely love my blog, as it is a way to showcase everything that I love, build confidence, escape from my schooling days and have it to look back on someday in the future.


Anyway … by adding the brick wall behind added a rustic vibe whilst still keeping it quite simple, but it added a layer of texture and another visual layer to the photograph. For only including my torso area meant that the image was concentrating on the t-shirt, which is what I wanted the main focus to be with a large piece of layered cake to help emphasise the lettering.

Overall I am happy with how it turned out! However I would like your advice with the shape of the photo. –Should it be square or round?
As the logo for my blog is round I was unsure if I should transition it through into my blogs image?

Now moving onto the cake itself … it was absolutely delectable. Light and fluffy chocolate cake that is not to rich and overpowering, which means with the chocolate buttercream and layer of maltesers there is an even balance in chocolate. I also included a layer of raspberry compote filling on top of a buttercream coating to add another pop of flavour, and help reduce the richness from the overload of chocolate. As the entire cake is pure chocolate, you can fill the cake with any desired filling that will complement the chocolate smoothly or you can just leave it plain with a layer of buttercream – the possibilities are endless.

As this cake is quite simple there are hundreds of chocolate cake and buttercream recipes online that you can search, as well as having your own secret recipe up your sleeve to use, so I will let you all create the magical cake with your own recipe! 


This cake would be perfect for a gathering, birthday party or a simple treat for your family – the cake was eaten in almost five days of baking it, which is rare for the whole cake to be demolished as my family are so used to cakes being baked they tend to be sent with my mum to work, so it doesn’t get wasted.


I hope you are all have a jolly Monday and I will speak to you all on Wednesday with a few pictures from my weekend away!

Bon Appetite!
M x

Wednesday, September 10, 2014

Just let things happen.

Sadly there will be no creative posts this week as I am going away today until Sunday. I will be free of internet (that I am aware of) to have a break from school and the crazy busy things around me. I will be cruising down the Murray River in a house boat, for the first time and I am certainly looking forward to the crazy adventure ahead. 

Sometimes it is best for things in your life to just happen at the drop of a hat and a moments notice, as these are usually the best experiences as well as the ones that take planning. Happiness is the one of the most important things about people, which is why it is necessary to take a break once in a while to be with yourself and others around you to in a way get yourself back on track. Refresh, de-stress and simply relax. 

I do plan on writing some motivational/ inspirational posts again, possibly once a week on a Monday to help get you back in the swing of things and start the day with a clear and positive mind. 

However, whilst I am away I plan on writing some posts, brainstorming some fresh ideas and mainly catching up on my schoolwork so that I am able to have some more time for blogging. 

I have less than 6 weeks to go until I finish school so bring on the summer of 2014/15 (wowzers a new year already - time flies!) and let me be free … 

 I could not leave you with no post at all whilst I am away, so I am going to leave you with some images that are simply inspirational and just beautiful. 

I will be updating you once again (my special talent) of what happened whilst I was away. I plan on taking some images of my trip for you all to see some Australian nature and countryside! Hopefully the weather is nice and I am sure it will just be an all round relaxing trip. 

What I thought was going to be a short post turned out to be a 'rambly' bits and bobs post, so on that note I am off! 


Pictures were taken from Pinterest! 

Speak to you on Monday!
M x 

Friday, September 5, 2014

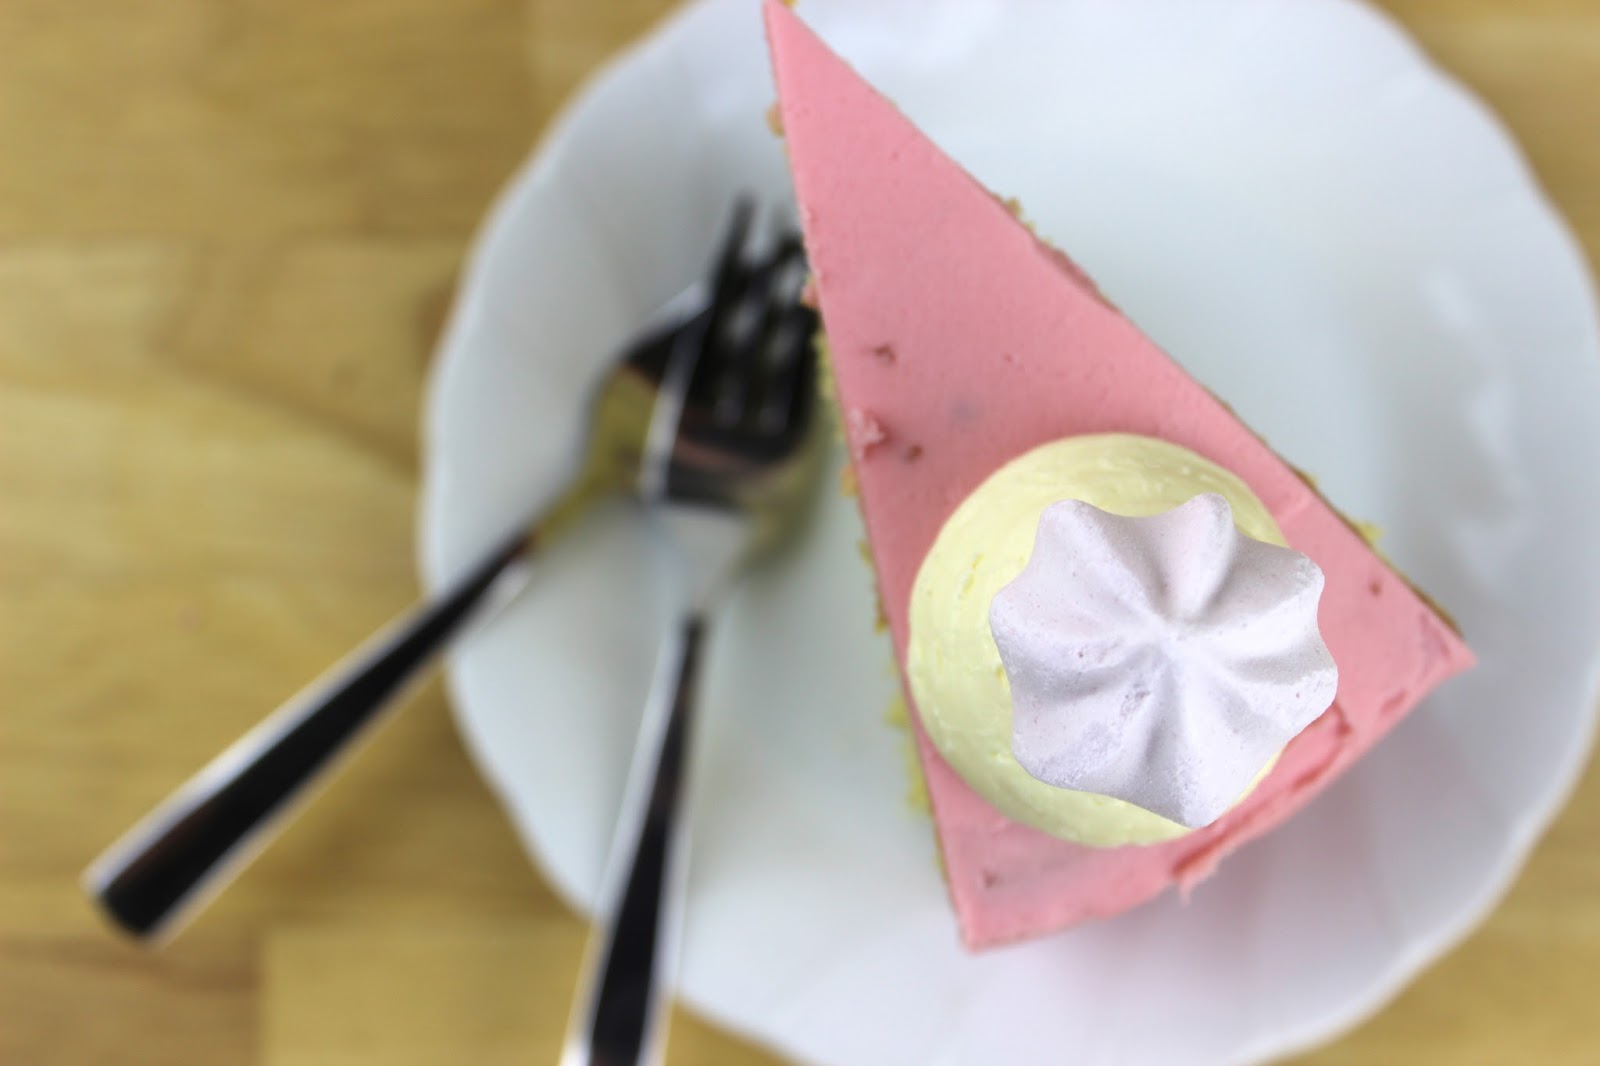
Raspberry & Cream Pastel Layered Cake.

Happy Friday to you all! It is almost the weekend where you can all relax and consume as much food as your belly's will hold. 


Today I will be sharing my very first layered cake.

 I must admit that it is not my finest work, but somehow it managed to stay standing and all the layered on the inside remain some what level.

I had a little disaster with baking my cake as it trying to make the parchment paper remain straight against the side of the pan so that it doesn't press into the batter. Everything is a learning curve and I will try again this weekend with another flavoured cake that should hopefully feature on my blog sometime soon! 


The cake is a very basic vanilla sponge with a vanilla buttercream coloured pink. It is filled with creamy vanilla buttercream and a raspberry jam layer spread on top. 

All of these components are super easy and only really require ingredients found in your cupboard, no expense spared. Although you may need a jar of jam or homemade would be perfect as well and a couple bags of icing sugar for the amount of buttercream needed. 


When it came to icing the cake I have to say that I am a perfectionist and spent a very long time trying to make the edges extremely precise. This obviously comes with practice along the way with how many cakes you make, which is why I am excited to make some more scrumptious tasting flavoured cakes in the upcoming months. 


The whole cake screams girls, pink and sweet! So I tried to keep it quite simple for the decoration on the outside, as it would look so over the top in the end that it would hurt your eyes looking at it with all the bold colours. 

I added these sweet baby meringues that I found in my baking cupboard at home and were just bought from the supermarket. I placed them on top of a dollop of buttercream frosting to add a little more depth, texture and another pop of colour to the cake. 


This cake was enormous and I can say that you would only need a slither or to and your belly would be overflowing with sweet goodness. 

I have not provided a recipe with this post as there are no technical elements to this cake other than layering, stacking and smoothing on buttercream. The vanilla sponge cake, buttercream and jam/ coulis can all be found online from your favourite recipe sources or classic homemade recipes of your own. 


Bon Appétit! 
M x

Wednesday, September 3, 2014

Caramel Popcorn and Chocolate Chip Cookie.

Good morning all! 

Today I am going to share with you a delicious caramel popcorn and chocolate chip cookie. Who knew you could put popcorn in a cookie? 


The cookie crumbles in you mouth and remains soft for quite a while, as we all love a warm gooey cookie rather than one that goes hard and crispy within minutes after been taken out of the oven. Trust me, it has taken many recipes to find the one cookie recipe that is perfect - soft, crumbly, delicious, bursting with flavour, adaptable, easy, and well to be honest I still don't believe I have found the right one just yet. 

The crunch of the popcorn, sweet caramel and oozing melted chocolate delights your stomach and satisfies that sweet craving. 


It is perfect to eat slightly warmed, so blitz it in the microwave for about 10-20 seconds so that the chocolate begins to melt. Also a glass of cold milk is refreshing on the palette. 


I am very precise when it comes to the size os my cookies. I have recently found that the average sized cookie weights 60g, so feel free to make them small for tiny bites or large for a gigantic cookie.  


Caramel Popcorn and Chocolate Chip Cookie Recipe. 
*Makes about 2 dozen cookies (depending on the size) 

For the caramel popcorn: 
1 bag of popcorn kernels (microwave bag is fine as well) 
170g unsalted butter 
220g packed brown sugar 
1 teaspoon vanilla extract 
1/2 teaspoon coarse salt 
1/4 teaspoon baking powder 

For the cookies:
120g unsalted butter, at room temperature 
90g packed brown sugar
65g caster sugar 
1 large egg 
1/2 teaspoon vanilla extract 
160g plain flour 
1/2 teaspoon baking soda 
170g chocolate chips (milk or dark) 
1 cup of caramel popcorn (more if required) 

Instructions 
To make the caramel popcorn 
1. Preheat the oven to 150-degrees and line a baking tray with parchment paper. 
2. Place the popcorn in a large bowl once popcorn as per the instructions on the popcorn pouch or bag. 
3. In a medium saucepan over medium low heat, melt the butter and sugar together. Once it is almost melt increase the heat to medium and bring the mixture to a boil, stirring continuously. Cook for 3-4 minutes, whilst stirring. 
4. Remove from the heat and mix in the vanilla, salt and baking soda. Stir until smooth. Poor the caramel over the popcorn quickly making sure to evenly cover the corn. 
5. Spread the caramel corn popcorn onto the prepared baking tray and bake for 20-25 minutes. Make sure to stir every 5-8 minutes. 

To make the cookies 
1. Preheat the oven to 180-degrees and line another baking tray with parchment paper. 
2. In a bowl of a stand mixer or ordinary bowl, beat the butter and sugars together until pale and creamy. 
3. Add the egg, followed by the vanilla, mixing after each addition. 
4. In a bowl, combine the flour and baking soda. Add slowly to the mixture and mix until combined and now add the chocolate chips and caramel popcorn, gently mixing. 
5. Drop your desired sized cookies onto baking trays making sure to leave room between each and bake for 10-12  minutes or until golden. Mine were around 60g in size. 
6. Allow them to cook on a wire rack for 5-10 minutes. However feel free to warm through in the microwave for 20 seconds to slightly melt the chocolate and caramel. 


Enjoy! 
M x

Monday, September 1, 2014

Lemon Drizzle Cake.

This light, tangy and moist lemon drizzle cake is perfect to bake for morning or afternoon tea. 


The recipe is so simple and easy that you could easily double or even triple the recipe to bake one large cake, which would be perfect to freeze for later, or if you were going to a party. It is a perfect light bake that isn't to dense and rich with chocolate, and I am sure some people love something a little lighter to eat once they have finished a meal. 


To make this cake you are going to use minimum equipment and the only addition that you will require for your ingredients is a lemon. All the rest should be staples in your kitchen at home. 


The sponge itself is light, fluffy and melts in your mouth straight away once you have drizzled it in your lemon icing and  it is still slightly warm. When you pour the icing over the top when it is still slightly warm, it will soak into the sponge and draw out a stronger lemon flavour. 


Lemon Drizzle Cake Recipe. 

Ingredients
The cake:
175g unsalted butter, at room temperature 
175g caster sugar 
3 large eggs 
175g self-raising flour 
1teaspoon baking powder 
Rind of one lemon 

The icing: 
115g Caster Sugar 
1/4 cup lemon juice  

Method:
1. Preheat your oven to 180-degrees and line a loaf tin. 
2. Cream the butter in a large mixing bowl until it lightens in colour and becomes light and fluffy. (You can use a stand mixer or hand held mixer here - saves using your arms!) 
3. Gradually add the caster sugar whilst beating all the time. 
4. Add the eggs one at a time with a dash of flour in between each addition. 
5. Sift the flour and baking powder into the bowl and mix gently, adding the rind of the lemon as the mixture starts to come together. 
5. Cook for around 30-40 minutes or if a tooth pick is inserted and comes out clean. 
6. Once the cake is removed from the oven and looking golden, leave to cook on a wire rack and make the icing. 
7. Mix together the caster sugar and lemon juice. 
8. Once the cake is cool, use a skewer or fork to prick holes in the top of the cake. Then pour the lemon icing  over the top allowing the juice to soak into the sponge. 
9. Serve. 


Enjoy!

M x