Thursday, December 4, 2014

DIY Christmas Bauble Cake Stand.

Good Morning! 


Today I am sharing with you this super simple DIY that will add a little sparkle and colour to your home. 

The first step is to find yourself a cake stand. Try to keep it simple, so that the decorations will stand out more and nothing should then clash. I also tied a checkered ribbon to the top of the stand. It can be two or three tiers - it is completely up to you. 

 Gather a selection of baubles, Christmas bells and other tree decorations like candy canes or stars in a mixture of textures - glitter, shiny, matte, etc. 
You could make another display, which is just placing all of the decorations in a vintage crate and placing it as a centre piece on a table. 


Start arranging the decorations and try to find a couple of major pieces that are the centre of attention for the DIY, so that it is not all basic colours repeated. I found this cross stitch bauble at a local store along with the striped large baubles. 


This would be a nice feature in your kitchen on a free worktop or in the middle of you dining room table to showcase more Christmas spirit. 

Thank you for reading! 
M x 


Wednesday, December 3, 2014

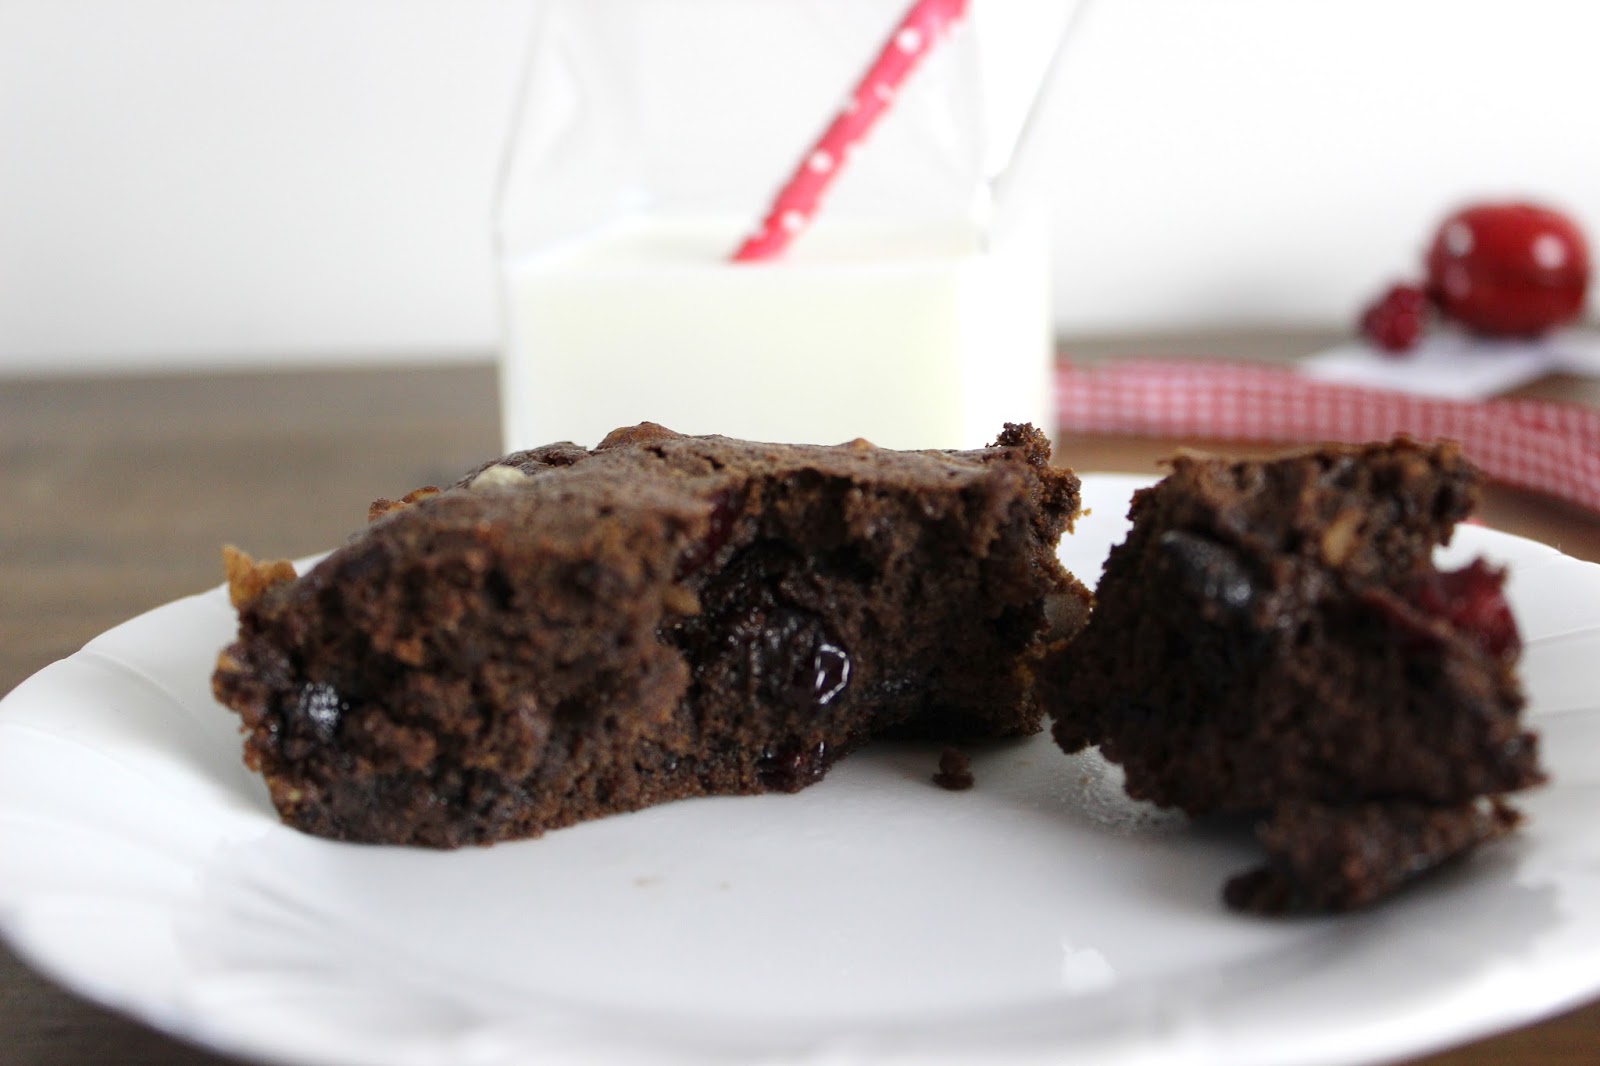
Chocolate, Cranberry & Macadamia Brownie.

Hello… 


What can I say, well in three simple words - chocolate brownie goodness! This brownie recipe has been turned into a perfect holiday treat that is bursting with flavour from the dried cranberries to the crunch of the macadamias. They are absolutely divine. 


Soft and gooey in the centre, warmed slightly and absolutely delectable with a glass of milk watching a Christmas film - a perfect December night well spent. 


Chocolate, Cranberry & Macadamia Brownies: 
150g dark chocolate, broken into chunks
200g butter
200g soft brown sugar
150g self-raising flour
40g cocoa powder, sifted
3 large eggs, beaten
50g dried cranberries
100g macadamia nuts
60g cranberry sauce

1. Heat the oven to 180- degrees C/ 160 Fan/ gas 4 and line a 20cm x 20cm baking tin with baking paper.
2. Melt the dark chocolate with the butter in a microwave bowl or in a heatproof bowl over a saucepan of simmering water.
3. Mix together the sugar, flour and cocoa powder and stir in the melted chocolate and butter mixture, followed by the eggs.
4. Stir through the cranberries, macadamia nuts and swirl through the cranberry sauce. (I completely forgot this step, but make sure that you have your cranberry sauce ready) 
5. Pour the batter into a tin and smooth over, making sure that the batter reaches all of the corners.
6. Bake for 25-30 minutes - if you bake for longer your brownies will not be as soft and gooey. Allow to cool before slicing or if you cannot wait serve as soon as possible so that the brownie is still warm to eat.


Happy Holidays! 
M x 

Christmas Movie Night.

Welcome back to day three of Christmas festivities! I would have to say that this post has to be my favourite so far. 

It involves; DIY, family, friends, Christmas, food and films - what's not to love? 


Find a space in your home - clear the top of a cabinet or table, and put together a festive Christmas movie night table. 


You can of course change the design and food according to your own tastes, however it only requires basic ingredients and a lot of the pottery can be found at a local craft store, second hand shop or around your home. 

What you will need: 
Glass jars to display your food 
Popcorn boxes 
Milk Bottles 
Straws 
Ribbons 
Decorative accessories 

Maltesers 
Popcorn Kernels (Follow the instructions on how to make) or pre-made popcorn 
Your favourite chocolate chip cookie recipe 

*Feel free to change the food around, add more for a larger spread and of course if you decide to create anything similar make sure to send me a picture or link it to me in the comment section down below. 


Go crazy decorating your space and making it your own. 


 Have the table close to the television so your guests and hop up and down to get more treats for the Christmas movie marathon. What are your favourite Christmas films? 

I personally love; The Holiday, Love Actually, Home Alone(s) & Nativity! 


These milk bottles are a nice element to add and of course you can add glasses of wine if you are of age, but if not milk and cookies are always a winner! 


Who doesn't love milk & cookies? 


I hope that you have enjoyed this post as much as I have, and make sure to pop back everyday up until Christmas for a new DIY or recipe! 

M x 

Tuesday, December 2, 2014

Christmas with Kikki K.

Christmas has to be my absolute favourite time of the year and with stationery being my next obsession, the two mix together quite well. A stationery store here in Australia that literally makes me want to jump up and down with excitements and happiness every time I walk into the store is Kikki K. (Don't worry I keep myself calm!) 

I have mentioned this store a couple of times before and I thought I would share a few bits from their 2014 Christmas collection. To simply summarise the style of the brand, I would say that it is; stylish, modern, colourful, chic and pretty much everything that I love in the one place. 

So this post should give you an insight on the type of products that the brand offers! 


I absolutely adore the style of advent calendar, with its simplistic colours and style - it is a statement piece to add into your living area.


Although I didn't display it like the suggested image of a christmas tree, instead I found these old-style ladders to hang them off using different patterned ribbons, which gives it a whole new feature. 


Once you have displayed it how you like, go nuts adding treats or small gifts for your family friends to open throughout the month of December up until Christmas Day. I opted for a balance of sugary goodness and health bars that are on offer in the supermarket or specific whole food stores, as there is a mix of what people prefer in my family. 


This gorgeous chocolate bar packaging from Kikki K is a new feature they have added this year and have partnered with Koko Black to produce an amazing sweet gift. I do admit that I love a treat now an then and chocolate would have to be one of them, but I don't just go crazy choosing any chocolate bar off the shelves. This rich dark chocolate would have to be a preference and I cannot wait to indulge into it watching a christmas movie closer to Christmas. 


You can have the treats sticking out of the top or hidden away so you can only see the top of the wrapper. 


So as I am sure you can guess already, I am in love with Kikki K. I adore their card designs and as some of them are to nice to send away in the mail, I decided to make them into picture frames. After Christmas has sadly finished I will be visiting their store to see what other sweet and stylish picture cards there are to transform into a collage on my wall.


I picked up some frames from a cheap craft store and spray painted them black, as this made the colours in the cards stand out more. A little trim to the sides of the cards and voila you are simple decorations to place around the home. 


Make multiple to give as gifts and feel free to use leftover cards from the previous years. 
You can find similar cards that I used here, here & here. 


I hope that you have enjoyed this post as much as I have! 
Make sure to come back tomorrow as the post to be published will have to be one of my favourites! 

M x 

Monday, December 1, 2014

DIY Christmas Baking Jar.

Happy Monday everyone and welcome to the first post of Blogmas. Whilst it has been a crazy last couple of weeks, I am starting to piece together a range of posts to share with you up until Christmas Day! 

To start the ball rolling, today I am going to share with you are super simple holiday gift that is unique and screams out thoughtful as it is handmade, which means that you can tailor it accordingly. 


The first recipe is a classic Triple Chocolate Brownie Mix. Who doesn't love brownie, which is why is the perfect gift to make. 

To gift: layer 3/4 cup (130g) brown sugar, 1/2 cup (110g) cater sugar, 3/4 cup (75g) cocoa powder, 1/2 cup (75g) plain flour, 1/4 teaspoon baking powder, 100g dark chocolate melts and 100g white chocolate melts in a 1L - 1.25L glass jar. 

To Make: preheat oven to 160-degrees (325F). Place all of the dry ingredients in a large bowl. Add 150g melted unsalted butter, 1 teaspoon vanilla extract and 3 lightly beaten eggs and mix well to combine. Pour the mixture into a lightly greased 20cm square baking tin lined with baking paper. bake for 30-35 minutes or until just set. Allow to cool completely in the in. Cut into squares to serve. Makes 16. 


To add a little twist to the classic brownie recipe above, substitute the chocolate melts for 100g macadamia nuts (can be finely chopped, but not necessary) and 50g dried cranberries. Use the exact recipe as written above and mix up the flavoursome ingredients. 


 Now for a scrumptious Cranberry choc-chip cookie mix. This recipe is something a little different, however is still delightful and sweet with the bursts of chocolate and cranberries. 

To Make: layer 1 cup (150g) plain flour, 1/2 teaspoon baking powder, 1 cup (90g) rolled oats (can be blitzed to a fine crumb if necessary), 1.2 cup (90g) brown sugar, 1/3 cup (75g) caster sugar, 2 teaspoons  mixed spice, 1/2 cup (95g) dark chocolate chips and 3/4 cup (105g) dried cranberries in a 1L- 1.25L glass jar. 

To Make: Place the dry ingredients in a large bowl and add 115g melted unsalted butter, 1 lightly beaten egg, 1 teaspoon vanilla extract and mix to combine. Roll tablespoons of the mixture into balls and place on large lightly greased baking trays lined with baking paper. Flatten slightly and bake for 8-10 minutes or until golden, but stills lightly soft in the centre. Transfer to a wire rack to cool completely. Makes approximately 20. 

I choose to add decorative labels which I found from here and here, as well as christmas accessories. Once the baking mix is placed in the jar, feel free to go crazy with the decorations, as this will make it more personal. 

You could add the instructions to the gift on the back of the label of create a new mini card that has all the written steps to follow - once again it is entirely up to you! 

I hope that you enjoyed the first Blogmas post and remember to come back everyday for a new DIY or recipe. 

M x