Thursday, February 19, 2015

Malteser and Chocolate Chip cookie.

Hello and good morning to you all! 


Well I think you guessed correctly by the title - yes it is yet another cookie recipe, but this time it is pure chocolate heaven. 

One of my favourite chocolates is Maltesers and one of my fantastic snacks that are 100% adaptable are cookies - hence why this combination has created an outstanding cookie flavour and texture. 


The oozing of the chocolate chips, the crumble of the dough and the crunch of the Maltesers all mould together to create a perfect sweet cookie. This cookie is absolute heaven and jam-packed with most things chocolate and oh my the crisp outer edge and the chewy centre certainly gets your taste buds dancing. 


Malteser and Chocolate Chip Cookies. 
225g unsalted butter, at room temperature 
220g caster sugar
220g brown sugar 
2 eggs, lightly beaten 
1-teaspoon vanilla extract 
1-teaspoon bicarbonate of soda
1-teaspoon baking powder
500g plain flour 
2 tablespoons malt powder 
1.5-teaspoons sea salt + extra 
400g milk chocolate chips
400g Maltesers (a mixture of roughly chopped and whole) 

1. Preheat the oven to 170-degrees and line cookie pans with parchment paper. 
2. Sift the flour, bicarbonate of soda and baking powder - stir in the sea salt and malt powder. 
3. Beat the butter and sugars together using an electric mixer until smooth and creamy - about three minutes. 
4. Add the eggs one at a time beating well after each addition. Then add the vanilla extract and mix well. 
5. In three additions add in the dry mixture, mixing until just combined. Lightly fold in the chocolate chips and Maltesers. 
6. Using an ice-cream scoop or your hands, form balls of dough - about 60g per cookie. 
7. Bake six per tray (vary according to your tray size) and bake for 15-18 minutes or until golden around the edges. Allow a few minutes to cool before transferring to a wire rack to cool completely. 


A perfect evening treat, afternoon snack or dinner party dessert nibbles - as you can make them to any size! 


Enjoy! 
M x 

Tuesday, February 17, 2015

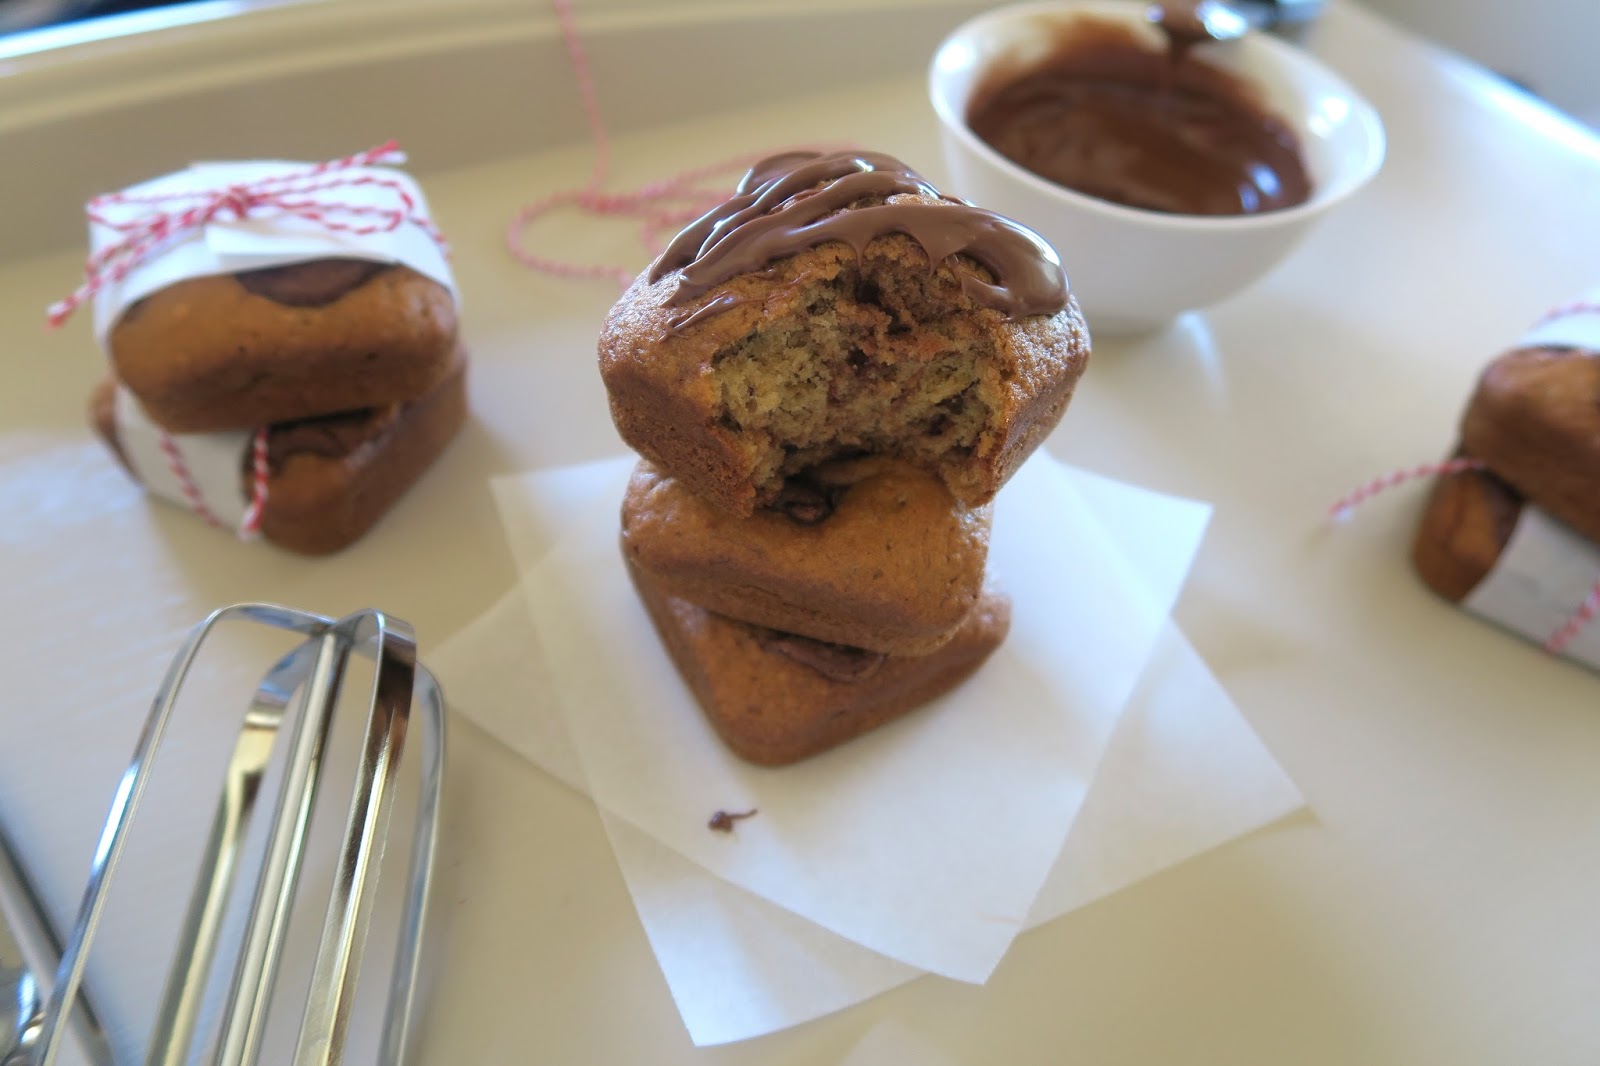
Banana and Nutella Cake Bites.

Good morning to you all - now although I only just realised that it is pancake day (shame on me) I did not prepare a delicious recipe for you! Next year I will hopefully be on the case and share with you a variety of jam-packed sugary goodness that is bursting with flavours prior to the event. There might be the odd recipe throughout the year anyway - because we can not just be restricted to eating Pancakes on the one day (if there was an rule I would have to ignore it!) 


Anyway onto the recipe … 

Who doesn't love banana bread? A delicious soft and warm cake texture filled with vanilla, banana and possibly a hint of cinnamon, but it has now been taken to the next level - with the addition of Nutella. I have opted to make a cake texture batter, as it is not as dense as a bread and add in some more scrumptious flavours. 


I mean who doesn't love a good treat of hazelnut and milk chocolate combined together to make the ultimate tasting spread ~ Nutella. 


Of course people like to get a little creative with the flavour combinations, but these Banana and Nutella  bites have the perfect amount of sweetness. 


It is absolutely bursting with flavour and the cake itself is so moist and delicate, but rich and creamy with the Nutella - a perfect match I say! 


I tried to mix in the Nutella two ways; firstly by scooping in the plain banana batter into the moulds and then swirling in the Nutella - however this can create an explosion in the oven causing the Nutella to blow up over the sides. Secondly I very lightly mixed the Nutella through the remaining banana batter to create a marble pattern. Although you can see the Nutella as much, it is certainly the most practical. (Hint: add more Nutella if you want to see more of it throughout the batter - or add some chocolate chunks as well!) 


Banana & Nutella Cake Bites. 
Recipe from: A Pastry Affair
1/2 cup (1 stick or 113 grams) butter
3/4 cup (150 grams) brown sugar, packed
2 large eggs
1 teaspoon vanilla extract
3 large ripe bananas, mashed
1 cup (125 grams) all-purpose flour

1 cup (120 grams) whole wheat flour
1 teaspoon baking soda
1 teaspoon baking powder
1/2 teaspoon salt
1/2 cup (118 ml) milk
1/2 cup (150 grams) nutella
Preheat oven to 350 degrees F (180 degrees C). Grease a loaf pan.
In a large mixing bowl, cream together the butter and sugar until light and fluffy. Beat in the eggs one at a time, mixing well between additions. Beat in the vanilla extract and mashed bananas until fully incorporated. Mix in the flours, baking soda, baking powder, and salt. Stir in the milk. Set aside.
In a small microwave-safe bowl, place the Nutella and heat for 15 seconds until lightly warmed and melted. Be careful, though; if the Nutella gets too warm it will seize up into a solid so less time in the microwave is better.
In the loaf pan, transfer 1/3 of the bread batter. Drizzle 1/3 of Nutella over the top and, using a butter knife, lightly swirl into the batter. Complete this step two more times, creating three layers. Bake for 55 to 65 minutes, or until a toothpick inserted into the center comes out clean. Cool loaf in pan for 10 minutes before removing and transferring to a cooling rack to cool completely.


Bon Appétit! 
M x 

Monday, February 16, 2015

Kikki K Create Review.

Good morning everyone. 


Let me start off by saying that I am 100% an Instagram addict, and I am not afraid to admit it. I am constantly refreshing my news feed and awaiting for fresh inspiration and pictures to be posted. I love to see snippets from someones life, everyday rituals and loves through photographs and of course those hashtags! I follow a whole range of people from Youtuber's, Bloggers, Health lovers and friends - one of my favourite things to do is hunt for new users. 


Kikki K have added a new feature to their company, which to be honest has probably been around for a little while now called Create - but I have recently only just discovered the magical creation. It is a place where you can have your photos printed in a number of styles including classic Instagram prints. 

You will receive 32 polaroid-style prints that are delivered straight to your door in a beautiful black and white box. 


Kikki K have simply created an incredible personalised photo service that makes the whole process so simple, as it all completed via their website - simply click and drag the snaps your love into one of their suggested printed collections and from there it is very straight-forward and extremely user friendly. 


I decided to choose photographs from fellow Instagramers that give me inspiration, motivation and just simple happiness, as I just fall in love with their snaps that they post. I decided the bunting style was a wise choice to display the images, as it is easy to rotate them by using mini pegs as well as having a continuous flow of creativity right above your work desk or around the room/home, which makes working a little less tedious. 

I already have a collection of images that I will be using for my next order - whether that is individual prints or an Instagram book (how awesome is that?) - I am not one hundred percent sure I will have to see what happens! 

I hope you enjoyed this post and get on board with printable Instagram photographs. 

M x 

Friday, February 13, 2015

The perfect last minute Valentines treat.

Hello all and welcome back! 


With Valentines Day only one sleep away, today I am going to be sharing a very quick and simple Valentines treat that is completely adaptable depending on whoever you are making this for. 


Whip up a deliciously light and fluffy vanilla cupcake batter and bake. Whisk together the frosting and this is the base layer to your canvas - from here you can add in other flavours and decorations. Go nuts! 


Add raspberries or any type of berries, chocolate, lemon curd, caramel, chocolate bars or even make a batch red velvet. It is completely up to you. 


These are seriously perfect for a last minute gift, dinner party treat or to share with your girlfriends at a girls night in. Everyone will adore you - because who doesn't like cake? 

M x 

Wednesday, February 11, 2015

Tim Tam Cookies.

Hello and welcome back for a scrumptious recipe! Today I will be sharing a classic chocolate chip cookie with the addition of Tim Tam to make it a little bit more interesting. 


How could you resist these soft, gooey, chewy, biscuit layer and double chocolate cookie?
The temptations are certainly high! 


TIM TAM FILLED CHOCOLATE CHIP COOKIESCookie dough recipe adapted from Butter Baking.
Makes 32 cookies.
220g unsalted butter, softened
3/4 cup brown sugar
1 cup caster sugar
2 eggs
1 tsp vanilla
3 1/2 cups plain flour
1 1/2 tsp salt
1 tsp baking soda
1 1/2 cups chocolate chips (milk + 1/2 cup of white chips to mix the flavours up a little)
1 1/2 packets Tim Tams (16 biscuits), chopped into different sized chunks. 
1. Preheat the oven to 180 C and line 3 baking trays with baking paper.
2. Using an electric mixer, beat the butter and both sugars until combined and fluffy. Add the eggs, one at a time, beating well after each addition. Add the vanilla.
3. Turn the mixer onto a low speed and slowly add the flour, salt and soda, mixing until just incorporated. Finally, mix in the chocolate chips. Finally carefully fold through the chunks of Tim Tam biscuits until just mixed through - you do not want to make the biscuits into a crumble as you mix them, try to keep the chunks. 
4. Using a medium cookie scoop or heaped tablespoon, scoop balls of the dough. 
5. Place on baking trays and bake for about 10 minutes, until lightly golden. 

Tim Tams are a classic Australian biscuit that is composed of two layers of chocolate malt biscuit sandwiched by a chocolate cream filling and covered in a thin chocolate coating - the perfect amount of chocolate, crunch and cream to add to a cookie! 


Enjoy! 

M x 

Tuesday, February 10, 2015

The Bar Counter.

Good morning to you all - today I am sharing one of my ultimate snack bars that I have recently discovered and am absolutely in love with! 

Some of these photographs are inspired from The Bar Counter's Instagram account, so make sure you head over on over and follow for updates and photographs that will certainly make you tempted into buying a secret stash. 


The Bar Counter have created a delicious and wide range of bars that are perfect for an after the gym snack, a sweet treat or a 3pm pick me up - they are an ideal size to slip straight into your handbag. 


The different type of bars cover raw foods to gluten free to no added sugar - all of which are made with the best combination of ingredients and flavours. 

Even some of the extreme flavours are delicious and packed with 100% premium quality and delight! 


The Raw food bars are perfect for vegans as they are filled with only natural ingredients - meaning on natural sugars and carbohydrates. All of the bars have a written outline of all the benefits on the front packaging, so that it is easier for the customers to understand all of its advantages. 


As always, I can only talk so much positivity towards these snack bars until you actually try them for yourself and your life will be changed. 

The bars are available in Coles down the health food aisle for $2.50 and if you are lucky $2 when specials are on - so make sure you stock up! 


So if you are feelings a snack that is gluten free, full of raw foods or just jam-packed with sweetness - then this is your go to healthy alternative snack bar. 


So what are you waiting for - go to your nearest Coles and stock up! 


Have you tried any of the flavours? Which one is your favourite? 

I hope that you have enjoyed this style of post and I am sure there will be more to come in the future - so stay tuned! 

M x 

*DISCLAIMER: This post is not sponsored and all opinions are my own. 

Monday, February 9, 2015

Make the most out of your Mondays.

A happy Monday morning to you all! 


After having a lot of time to think and absorb a load of new inspiration, from blogs (especially ALO), Instagram, Pinterest and books - I think I am now heading back on track and ready to embark on a new blogging adventure.

 As everyone is aware of, Mondays are the day that is back in a flash and take no hurry moving into the rest of the week - so today I will be sharing some of my favourite habits that I like to kick start the week with! 


Be productive. It always seems to be that my mind knows what it has to concur, but my body will tell it otherwise. I would say that my procrastination levels can be considerably high if I do not snap out of my daydreaming and actually start doing something. I am constantly thinking and dreaming of my goals - however I can become incredibly lazy and not push myself into actually doing them. By setting a reasonable amount of tasks to achieve on a Monday, it will hopefully set you up for the rest of the week of staying productive. Of course it is ok to have breaks and watch some television, but you have come straight back to your work and getting the jobs ticked off. 

Set some weekly goals. I love to set goals, as this means writing a list. Making short and long term goals allows me to stay somewhat focused for the day/week ahead. Every Sunday night I love to have a notebook and pen armed and sit down right before I hit the hay and plan out my days and week. I find this  A) comforting B) fabulous for the eyes as you are not staring into a bright electronic device right before bed and C) you get to write a list! I love the feeling of waking up and knowing a near enough plan of what my week will be like and how much I want to achieve. Of course plan out your major todo list points and crucial tasks that require a lot of attention, and then weave in and out the remainder of your odd jobs, breakfast dates, supermarket runs and baking sessions. 

Wake early. I know this one is a tough one for many people, but it does wonders. I love to wake early (as often as I can - of course sleep in on the weekend) and try to concur as much as I can in the first few hours of the day - to be honest this is when I function best (although my YouTube subscriptions can catch me out at times!) If you can complete everything on your to-do list for the day by around 3pm you have the entire afternoon to binge watch television shows, go shopping, bake or treat yourself with an afternoon coffee, the list is endless. 

Be active. Of course it does not have to be a 10 kilometre run or an extreme bootcamp - go for a morning walk to soak in the fresh air, this will certainly make you feel awake by the end of it. Alternatively have a go at a mini cardio circuit - there are plenty of videos to choose from online or if you are defiantly not feeling it at all, a simple yoga routine will definitely clear your mind for the rest of the day.

Eat well. Fresh food and drinks are the best choice for a Monday morning after it trailed off on the weekend. Start introducing those fruit and vegetables back into your diet - find some delicious whole food recipes and feel energetic throughout Monday to Friday. Have a sweet treat every now and then but only make it a novelty throughout the week!

Create a clear space. More often than not you clean and tidy your bedroom or home and within an hour clutter finds it way back out onto the open spaces. Spend Sunday afternoon tidying and reorganising your work space, bedroom or whole home. By not having random bits and bobs out it will make your mind clear and ready to concur the day/week. 

Use Sundays to stock up the fridge (cook in bulk so that it is all prepared), clean and of course write those lists! 

Just small bursts will make a difference and before you know it - each little task will creep its way into your everyday routine!

What do you love to do on a Monday? 

M x