Thursday, October 9, 2014

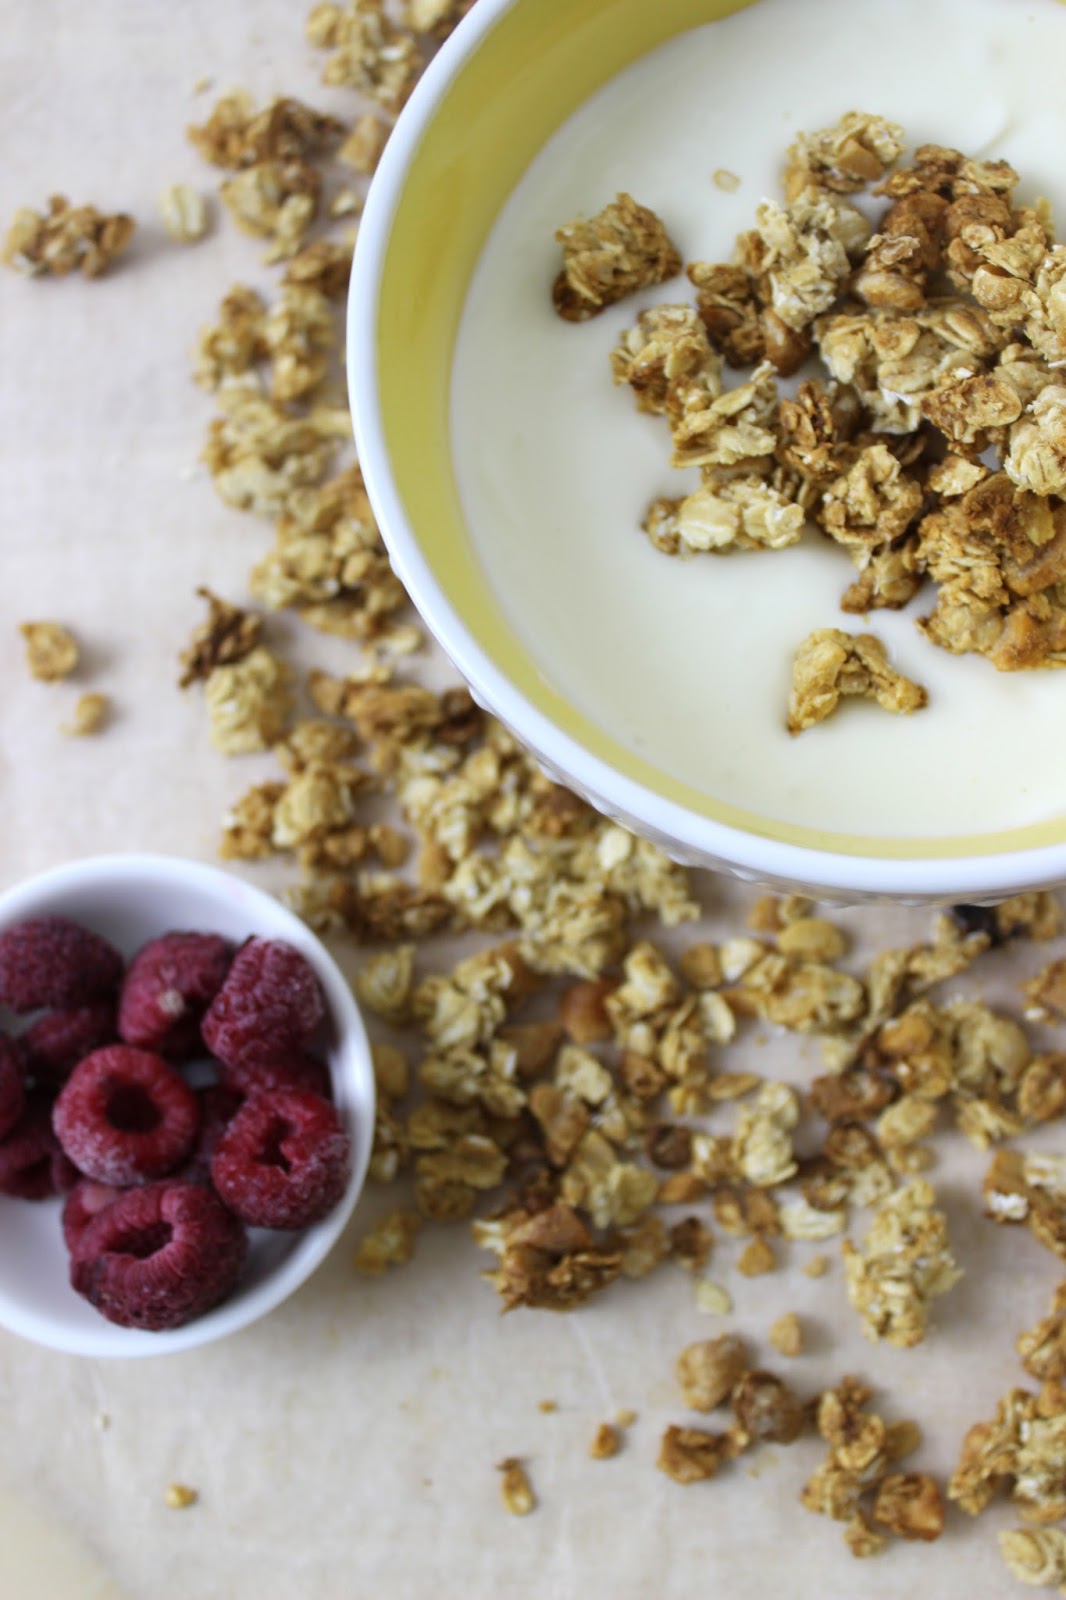
Peanut Butter Granola Clusters.


Hello, 


The great news about this granola is that refined sugars are long gone in this recipe, making it a gluten free vegan everyday snack. The granola clusters are slightly sweet, satisfyingly crunchy and a burst of pea nutty goodness in each bite. The centres should be semi-soft which should occur during the baking and resting process, because the worst moment is diving into a bowl full of scrumptious granola and not being able to even hear your own thoughts. However, the crunch is part of the whole experience, am I right? So maybe a little bit of silence is ok every now and then. 


You can used the base ingredients from this recipe and then simply spice it up with your own favourite ingredients according to your own tastes. I settled with this peanut butter granola first because it’s;
  1. Amazing clusters every time
  2.    Raspberries and yoghurt are its best friends along with banana and honey
  3. ‘Easy peasy’ to make
  4.  Dam straight delicious
  5. Bakes beautifully 
  6. Makes your kitchen smell like home baked magic 


A handful of these bad boy clusters make a perfect snack and are begging for you grab them out of jar and a lot of the time you will find your self bursting into the jar and digging your way to the bottom. Every bite should explode of pure goodness in your mouth every single time.


I served mine with thick and creamy greek yoghurt, which tastes as though you are eating pure thickened cream only healthier and somewhat better. I love adding fruit with mine; raspberries, blueberries and bananas are all perfect with a drizzling of honey (or vegan alternative).

This has been my go-to breakfast for a couple of years and there are seriously so many different combinations. Even if you can't get around to making a batch of granola at home the supermarkets offer an extensive range, however we all know that baking from scratch at home is truly satisfying and it makes the home smell and feel welcoming and cosy. 


I seem to have tried many recipes for muesli and granola over the time of discovering this creation, and I am pleased with the end results that this recipe is going to remain in my 'handful' of top breakfast recipes.


 So say hello to oats, whole flour, double peanut butter and nut goodness, plus the gang of additional ingredients that are going to blow your mind once baked.

Recipe
Ingredients:
3 1/2 cups wholegrain Rolled Oats. (use GF is required)
1 cup of Peanuts (you can use honey roasted, salted or unsalted and chop if you want but not necessary)
3/4 cup Whole Wheat Flour
1 1/2 teaspoons Baking Powder
1/2 teaspoon Salt
3/4 cup Natural Peanut Butter
2/3 cup Rice Malt Syrup
2 teaspoons Vanilla Extract
1/4 cup Almond Milk

Method: 
1. Preheat the oven to 180-degrees and line a cookie pan with parchment paper.
2. Mix the oats, nuts, flour, baking power and salt in a large mixing bowl. Whisk together to peanut butter, rice malt syrup, vanilla and milk until smooth. Pour the wet mixture over the oat mixture and stir to combine.
3. Pour the granola mixture on the prepared pan and spread evenly. Bake for 15 minutes, stir once. Bake for another 15 minutes until golden brown. Leave the granola out for around 1-2 hours to cool, cluster and crunchify.
4. Serve on yoghurt with fruit or milk, or just as a cluster snack.

NOTES:
- Sprinkle with a dash of sea salt once cooled for extra zing of sweet and salty taste.
- You can customise the flavours according to your tastes. For example, use different nuts, nut butters and sweeteners. An alternate flavour combo could be 'almond honey' including almonds, almond butter, with honey and brown rice syrup. Mmmm


I hope you are all having a glorious week and make sure to follow me on all my social media links, so if you decide to recreate any of the recipes I post, you can easily tag me and I can like them all!

Bon Appétit! 
M x 

Tuesday, October 7, 2014

5 Positive things to do this week. #1


*Experiment with a new cupcake flavour. 
*Value your days. 
*Book a meal with close family and/ or friends. 
*Go offline at least one night a week (to begin with). 
*Learn something new. 

Hello everyone and welcome back!

After deeply browsing the web for inspirational ideas, I came across a wonderful blog written by Lisa (Mathilde Manech). In a nutshell, it is a lifestyle blog that covers everything from 'home, craft and style inspiration', which is displayed neatly and beautifully on her bright and enthusiastic blog.
Many of her posts are a series, for example; 52 lists, 5 or 30 positive things to do this week, tote of the week, etc. By sharing these simple but inspiring posts each week, it can really help others in the smallest of ways.

After clicking the 'previous page' button a number of times to read her earlier posts (I love them all), I found that this blog is very me and I love that I have found a little part of the blogging world that I can travel back to and can always rely on the author for truthful information and inspiration.

So as you may have already guessed, I adore so many of her ideas, which is why I am going to start some of my own series. This post was inspired by her so I hope you enjoy.

I hope you enjoy and stay tuned for some exciting upcoming posts!
M x

DISCLAIMER: If there are any similar posts that have been found on pervious blogs or Lisa's, I do not take credit for the creation. On the first post of the series I will note the creator and author of whose idea it is, so that you can source the original content. Thank you. 

Thursday, October 2, 2014

A vintage cafe in the hills.

Good Morning. 


Yesterday I travelled up to the Adelaide hills with my mum for a spot of antique and general shopping. Whilst I did not find any vintage treasures, I stumbled across this gorgeous cafe on the main street, which I simply fell in love with and could not not share with you! 


The outside decor caught my eye first time around when we walked up the street and then as we wandered back down, we decided to pop on in to have a cup of coffee and a hot chocolate. Plus a naughty slice of brownie, however it was vegan and gluten free - bonus! I love health food shops and cannot wait to discover more, because they are definitely becoming more popular. 


I am slightly obsessed with recycled furniture lately, which is one of the reasons for going antique shopping, but I will just have to look a little further and visit more op shops, garage sales, house sales and auctions to see what I can get my hands on. Anyway the wooden tables that were outside, inspired to make something similar, so we will just have to wait and see what happens. 


The delicious chocolate Goji Berry Brownie that was simply guilt free! 


The interiors on the inside were beautiful and certainly down my avenue of taste and style. I loved the vintage style and tried to capture a couple of secret photographs to share with you, as I am still learning and building the confidence of asking and photographing in public. 


The drinks were on vintage saucers that were all different, as well as the sweet treats. The atmosphere of the cafe is quiet and relaxing, which is perfect if you are wanting somewhere to possibly study, read or a quick stop for a bite to eat. 


Sadly there is no social media sites or website for me to link you to, so if ever I go back (which I hope so) I will hopefully take some more pictures of the food, so that you can see for yourself what there is on offer. 


 Whilst the service did not excel, I am more than happy to go back again and try some more delicious treats that are healthy, guilt free and are still as scrumptious as a normal chocolate bar. (Even better in my personal opinion!)


Mmmmm… chocolate goodness! 


 I think it was a winner don't you? 


Simple interiors can speak a million words, inspire people and capture the moment and style incredibly. 

I hope you have all enjoyed this style of post and I cannot wait to go an explore some more cafes and stores throughout the summer to share with you all. I certainly loved doing it - I felt like a tourist in my own state with my camera around my neck capturing each moment - if that is possible?

Anyway I hope you all have a lovely day. 
M x

Tuesday, September 30, 2014

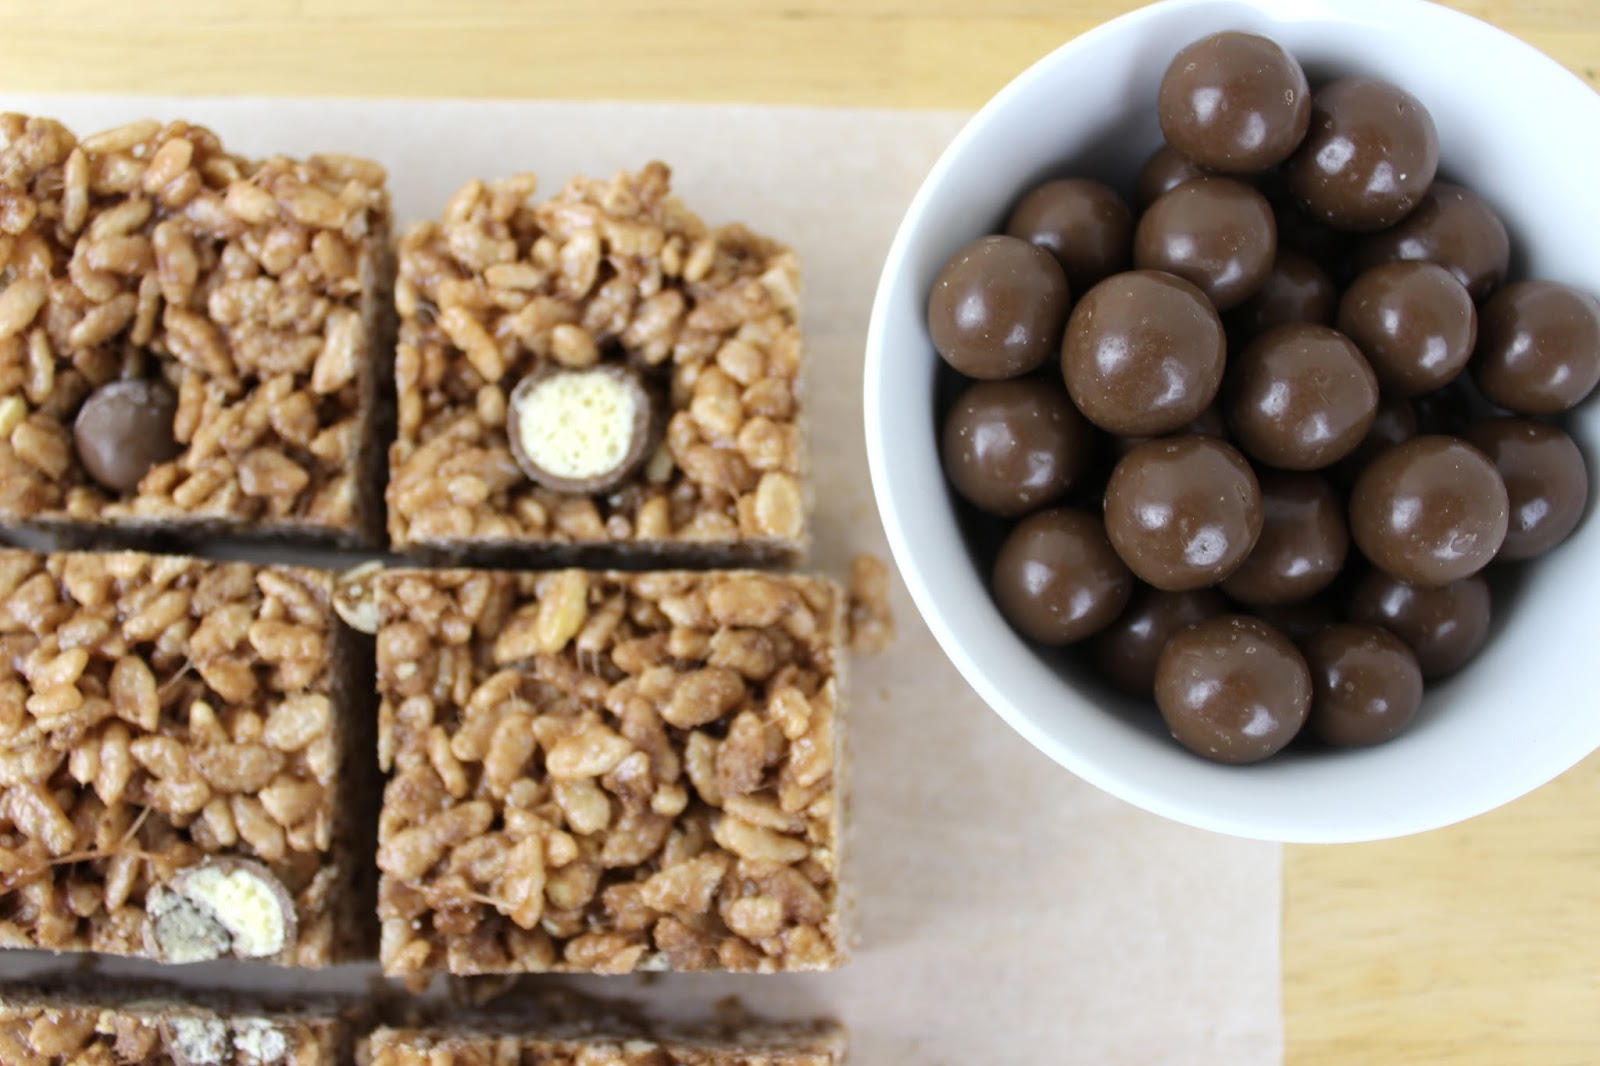
Malty Marshmallow Treats.

Good morning to you all! Firstly apologises for not posting within the last few days, as my Internet has been dropping out frequently, so I have not been able to jump onto the web. 


I am sharing with you a super sweet treat that is full of sugary, chocolate, marshmallow goodness. 


Who doesn't like chocolate pieces in their bakes? Apart from the hassle of actually trying to stir them in the mixture, because it is a challenge to not want to open the packet first and eat them as you go. Sometimes the chocolate wins and other times the will power over runs it! 


Whilst it is not the healthiest of treats, the title does give it away by stating it as a 'treat'. We are all allowed every so often and these are perfect to wrap up and take on the go. 


A little tip: you will be strong teeth to bite into these, because once the marshmallow and butter sets it is solid - but that is more fun right? 


Salty and Malty Marshmallow Treats Recipe: 
*Serves 9 reasonable portions 

120g Unsalted Butter 
40 Large Marshmallows, preferably white 
1/4 teaspoon salt 
6 cups rice cereal 
1/3 cup milk powder 
1 cup coarsely chopped Maltesers 
Coarse sea salt for topping 

1. In a large saucepan over medium heat, melt the butter. Melt it until it begins to crackle and sizzle, and it starts to brown. 
2. Add the marshmallows to the melted butter and reduce to a low heat. 
3. Add the salt and stir until the marshmallows are completely melted and are throughly combined with the butter. 
4. Quickly add the rice cereal and malt powder, and stir to combine. The mixture will now become thick and sticky. 
5. Allow the mixture to cool slightly before adding 3/4 cups of Maltesers and stir until just combined. 
6. Press the mixture into a 9x9 inch square pan. 
7. Firmly press the mixture into the prepared pan and make sure the bars are thick. 
8. Press the remaining Maltesers pieces into the top of the treats. 
9. Put in the fridge to set for around 20-30 minutes. This process will not take long due to the bars already being so thick and sticky. 
10. Slice in 9 large squares or smaller pieces, whatever your heart desires. 
11. These treats will last unto five days. 


Bon Appétit! 
M x 


Monday, September 22, 2014

Chocolate & Marshmallow Cookie.

And we are back again on this glorious Monday for a sweet recipe. 

Can I have a drum roll please for the fantastic recipe of Chocolate and Marshmallow Cookie! A wonderful treat to bake for an Autumn evening and even throughout the winter time. 


This delicious chocolate and marshmallow is scrumptious and like I say with most of my bakes, they are best warm. As it includes marshmallows, you want it to still be slightly melting along with the chocolate oozing out in each bite. 


It is the perfect recipe for a campfire, as it is a twist on the classic smores. 


As per usual this treat is easily adaptable for your desired taste and it went down a storm at one of my family gatherings a couple of weeks back. 


I hope you enjoy this awesome recipe and be sure to come back on Wednesday for another yummy post. 


Chocolate & Marshmallow Cookie Recipe. 
*Makes about 18 cookies 

Ingredients 
100g dark chocolate 
75g unsalted butter 
1 1/4 cup caster sugar 
1 egg
1 and 3/4 cup plain flour 
1/4 teaspoon baking powder 
1/4 teaspoon salt 
1 bag of marshmallows, roughly chopped 
50g dark chocolate 

Method 
1. Preheat oven to 180-degrees and line a baking tray with parchment paper. 
2. Melt the chocolate in a heatproof bowl and let it cool.
3. Mix the butter and sugar with an electric mixer until fluffy. 
4. Add in egg and mix well. 
5. Gradually add the sifted flour, baking powder and salt. Mix well. 
6. Chill in the refrigerator for 20 minutes.
7. Make small balls (30-60g) from the dough and place chopped marshmallow pieces on the cookie alongside chunks of dark chocolate. 
8. bake for 12-15 minutes and transfer them to a wire rack to cool. 


Bon Appétit!
M x 


Friday, September 19, 2014

Raspberry & Lemon Cheesecake.

Another scrumptious recipe it heading your way this very instant! 

As you can tell by the title and possibly the photographs below, I am sharing with you a delicious, creamy and sweet cheesecake recipe. 


As you can tell from the images the ratio between biscuit and cream cheese is slightly different. So in order to not be hit with a whopper amount of raspberry and lemon cream cheese, I decided to make an extra portion of the crumbled biscuit base to sprinkle of the top, which would add more texture to the top for when you first spoon into the glass. 


It is a perfect option for a 'lighter' dessert, as it is not full with rich chocolates making it dense and overwhelming. 


A perfect summer treat! 


Raspberry & Lemon Cheesecake. 

Ingredients 
For the crust 
160g graham crackers (simple digestive biscuits will work also) 
1 tablespoon sugar 
70g unsalted butter, melted 

For the filling 
120g caster sugar 
zest of 2 lemons 
8oz cream cheese (1 packet) 
2 teaspoons lemon juice 
1 teaspoon vanilla extract 
165ml double cream, whipped 
200g raspberries (fresh or frozen, either will work) 

Method 
1. In a food processor blitz together all of the crust ingredients until it resembles and crumble mixture. 
2. Evenly divide the crumbs between your individual serving dishes and press firmly into the bottom, making sure to keep 4 tablespoons for later, (1 per cheesecake). 
3. In a large bowl mix together the sugar and lemon zest. Add the cream cheese and beat with an electric mixer until smooth. 
4. Add the lemon juice and vanilla mixing to combine. 
5. Using a rubber spatula, fold in the whipped cream until well blended and then fold in the raspberries. 
6. Evenly pipe or spoon the filling into the serving dishes. Cover with plastic wrap and refrigerate for at least 2 hours before serving. 
7. Garnish with leftover crumble (3TBSP), raspberries and a sprig of mint. 


Bon Appétit! 
M x

Wednesday, September 17, 2014

A mini break away.


As you may or may not know already, from Wednesday to Sunday last week I had a mini break away and spent the time cruising the Murray River in a house boat. So I thought I would shares some picture snaps with you if you are not aware what the Australian surroundings look like near the River. 

It was certainly a relaxing break that allowed me to study at my own pace, read, soak in the spring sunshine and practice taking photographs - which I adored. 


Here are some snippets of the boat itself as well as the environment, places we moored and wildlife. The large boat in the images below are a well known house boats that sails the river and has many cabins onboard for numerous guests. The design and detail of the boat was simple beautiful and traditional. 

As well as walking around a couple of the towns it made me really appreciate architecture and how much I have fallen in love with the style and minor details to buildings. 


Whilst the evening and mornings were exceptionally chilly, it was cosy to wrap up in layers watch films or read books whilst being able to see all of the outside world pass by with the number of sliding doors inside the boat. 


It was defiantly a unique experience and I would certainly recommend you give it a whirl for a couple of days away and I would love to step it up to the next level and hop onto a cruise ship some time soon. 

Enjoy! 
M x